In a previous post, I explained how to configure Azurite to use a self-signed certificate to enable OAuth authentication. One challenge with this method is that the Azure Python SDK will refuse to connect to azurite, reporting errors such as:
azure.core.exceptions.ServiceRequestError: [SSL: CERTIFICATE_VERIFY_FAILED] certificate verify failed: unable to get local issuer certificate (_ssl.c:1006)
This is because the the Azure SDK uses the Requests library, which in turn uses Certifi as its source of root certificates. Certifi provides a regularly updated bundle of the Mozilla root trust store, and our self-signed custom certificate obviously isn’t in Mozilla’s trust list!
I’ve been using Azurite to simulate Azure storage for my development. If you’re not familiar with it, Azurite is a local storage emulator for Azure Storage, and you can read my other post about how i’ve set up my devcontainer configuration to run Azurite as a service container. As my deployed code is using an Azure Managed Identity, I wanted ensure my development environment was consistent with this and also uses Azure DefaultAzureCredential credential provider class. In this post, i will talk through the steps required to switch from using a connection string (with a well-known account and key) to using OAuth and HTTPS, helping to increase feature parity between development and production, reducing the chances of mistakes.
When developing with Azure Storage, it can significantly speed up your development process if you can use a local development environment, rather than constantly connecting directly to storage in Azure itself. This is where Azurite comes in - Azurite is a local storage emulator for Azure Storage, mimicing blob/container, queue and table storage. While there are lots of ways to get it running (e.g. from binary, manually using Docker etc.), I wanted to set it up as a service container in my devcontainer configuration which provides a few benefits:
In Pulumi, when calling pulumi_azure_native.storage.list_storage_account_service_sas_output() to generate a SAS, you pass the required permissions to the permissions: Input[str | Permissions | None] parameter. pulumi_azure_native.storage.Permissions is an enum, offering simple selections (R, L etc.):
But you can also pass a string of permissions, any of R, L, D, W, C, A, or P, depending on the actions you want to allow for the SAS. This allows you to specify permissions for reading (R), listing (L), deleting (D), writing (W), creating (C), adding (A), or processing (P) blobs within the container, such as permissions="RWL":
Another note for myself. I wanted to use this to give my app access to the entire account. I thought they would be a property of pulumi_azure_native.storage.StorageAccount but they’re not. Instead you need to call pulumi_azure_native.storage.list_storage_account_keys().
In a storage account, you can create a SAS scoped to a specific container, however, that SAS does not have permission to execute BlobClient.exists() as this requires at least list privileges on the parent object (e.g. the account), and when you try to perform the check, you’ll get this error:
azure.core.exceptions.HttpResponseError: This request is not authorized to perform this operation.
Note that this is an HttpResponseError, not a ClientAuthenticationError (which is actually a more specific error which extends HttpResponseError), so you need to interrogate the specific response code, although note that if the container client does not exist, you might also get a ClientAuthenticationError with this message:
This post is mainly a reminder to myself, because i’ve made the same mistake a few times in different projects.
How and why to deploy Azure functions from a package
When using Azure Functions, you can simplify deployment and maintenance of your function by deploying from a package file rather than directly in to the function. This also has the benefit of reducing cold start times, particularly where there are a large number of dependencies.
If you run in a dedicated mode, you need to turn on the Always On setting for your Function App to run properly … When running in a Consumption Plan or Premium Plan you should not enable Always On.
When uploading images to Wordpress, you may get this error. There are plenty of blogs online offering solutions, but they only apply to self-hosted instances - mine is hosted on just-what-i-find.onyx-sites.io/.
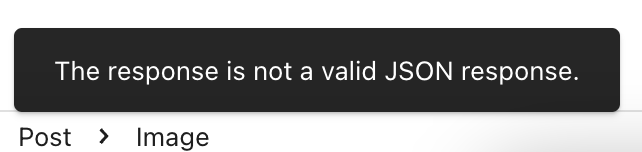
The error is a little pop up with the text The response is not a valid JSON response at the bottom of the screen when you try and upload an image: