I’m sure we’ve all been there - coat on, shoes on, just about to lock the door and - “did i leave the back window open?”
I wanted something which shows me, at a glance, which windows are open, or confirms they’re all closed.
goals
low maintenance - dont need to charge it every week
automatically updates in a few seconds
our windows can be “closed” or “latched closed” (with a ventilation space around), so support both
easy to glance at - no complex dashboards
small and unobtrusive.
What i used
Home Assistant Yellow
SNZB-04P/PR1 sensors
2.6" Hanshow Polaris Pro 280 Electronic Shelf Label
LilyGo T-Panel S3
OpenEPaperLink HA integration
Window sensors
I wanted sensors with long battery life. I have a Home Assistant Yellow at home, which has Zigbee support. I already have several Zigbee plugs around the house. Most permanently powered Zigbee devices act as “routers” so there’s a strong network around the house. I decided to buy Sonoff SNZB-04P:
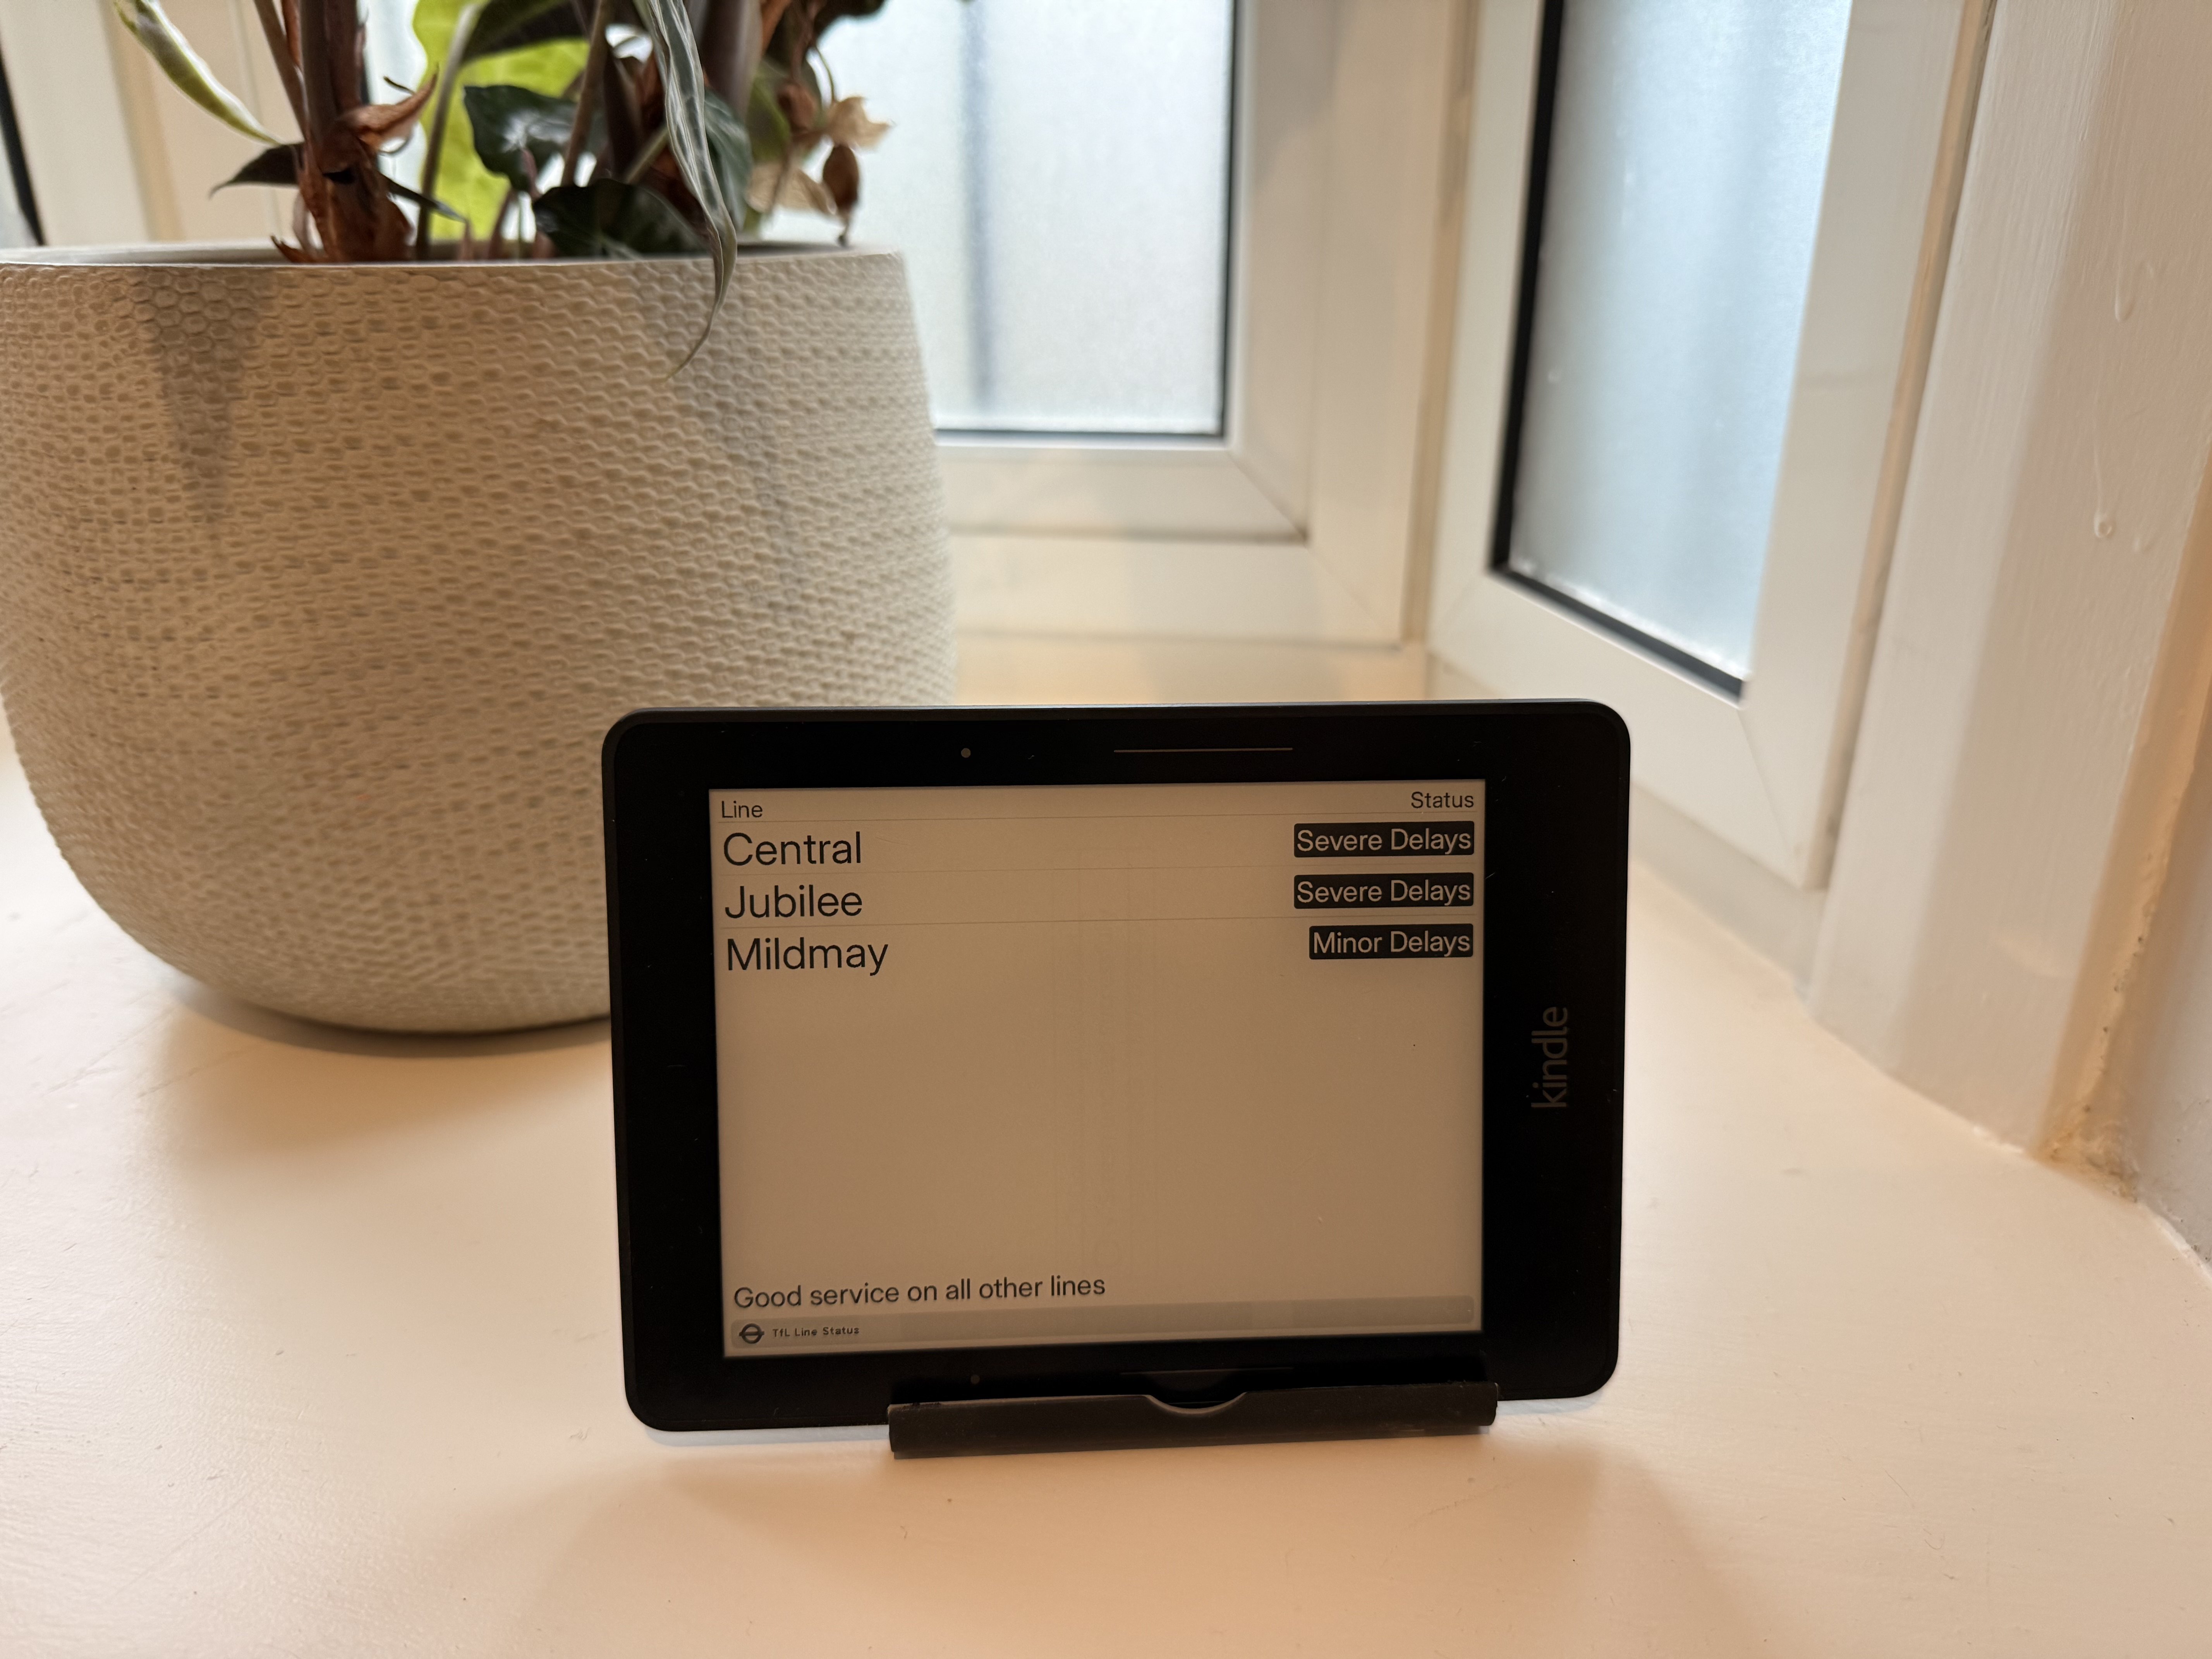
I’ve written before about TRMNL - it’s a great project. During a recent cleanout, i found an old Kindle Voyage in the back of a drawer. As well as supporting their own devices, TRMNL offers a “BYOD” licence and, if you manage to get it up and running on a device that nobody else has published before, they even give you back some of the licence fee!
TRMNL is an awesome open-source ePaper display that lets users show almost anything they want. Launched on Kickstarter, it’s now got thousands of plugins and users. I’ve published a few plugins, including a realtime TfL bus stop arrival time board.
A few weeks ago, TRMNL added an MCP server. This lets you use a local coding agent to do most of the grunt work.
Install the MCP server through .mcp.json
Using Claude Code, i created a simple .mcp.json file which references the API key by environment variable. Place this in the root of your repo. As it contains no secrets, this is safe to commit:
I previously wrote about how i’d implemented a combination of 1Password’s CLI and direnv to avoid storing passwords on disk. This works great, most of the time. The problem comes when i want to add a secret and i’m in the middle of a complex multi-agent task - because the environment is loaded once before Claude or Codex or whatever starts, adding or rotating credentials during a build (e.g. if the agent needs an API key to a new service, or accidentally exposes a secret to its context) is tricky. So i’ve evolved the system slightly.
separation of this vault from my main password vault in BitWarden. My whole world exists in Bitwarden - i dont want to inadvertently expose it. And as Bitwarden has a pretty awful CLI experience, it doesnt work for me.
Safe to commit secret file to source control
Safe to commit my .env files to source control because they no longer contain secrets
If you’re running Claude Code against your own API key or through a proxy instead of Anthropic’s native backend, you’ve probably noticed that the built-in WebSearch tool just doesn’t return results because it relies on a server-side API that only exists at Anthropic. Without web search, the agent cant research, so we built a self-hosted replacement using MCP.
What we built
The brilliant DDGS is an open source metasearch server that aggregates results from DuckDuckGo, Bing, Google, Brave, and Yahoo. It has a built in MCP server which exposes five tools: search_text, search_news, search_images, search_videos, and search_books.
Claude Code can do a lot of things. But can it keep a plant alive?
The Plant: Act I — Fifty-Eight Days
October 22 – December 19, 2025
On October 22, 2025, the moisture sensor read 1829, the first of 5,568 check-ins over fifty-eight days. The scale runs from wet at roughly 1100 to dry at 3400, putting that reading in the middle.
The sensor is in the pot of a Tradescantia zebrina. There’s also a 5l jug of water with a pump, a grow light and a camera. Claude’s job is to keep the plant alive - basically, keep the moisture in range and run the grow light on schedule, writing notes after each cycle so it could pick up where it left off. At the start, there were five unknowns: plant species, target moisture range, soil type, ambient temperature, and pot size. Claude logged all five, ran a 60-minute grow light session, and began monitoring. The full session logs, sensor data, and photos are at plants.cynexia.com if you want to follow along.
I have a personal GitHub account and a corporate one, and I found it annoying to have to select the correct SSH key for work repos, so I configured git and SSH to pick the correct key for me. After initial setup, there are three config files to modify:
After the initial setup, there are three config files involved:
Git URL rewrite (~/.gitconfig) — rewrites work org URLs to an SSH host alias
SSH host alias (~/.ssh/config) — maps that alias to the right key (and port 443 if needed)
Work-only Git identity (~/.gitconfig.work) — sets work email/name/signing key, loaded automatically for work repos
Claude Code is pretty amazing. It’s let me build prototypes and improve apps faster than I ever thought possible. But I was wondering - what else can it do?
I’ve been using Emby for years, but recently I started to wonder what happened to Jellyfin, the project that forked Emby years ago. So i decided to ask Claude Code to help me by setting up a debate and mediating the answer.
I was recently asked to design a method to meet ITAC (IT Application Controls) standards for critical data flows in our organisation. ITAC are application-level controls looking mainly at how we ensure the completeness, accuracy and validity of transactions - for example, invoices or trades. Our control set is based on the ICFR principles, of which ITAC is one part.
The specific control objective I was asked to look at relates to the risk of loss of integrity of financial data transfers. The focus on the integrity of the data, not authenticity or non-repudiation is really important as it means cryptographic solutions aren’t required - Kafka’s native protocol features can satisfy the requirements.
In a previous post, I explained how to configure Azurite to use a self-signed certificate to enable OAuth authentication. One challenge with this method is that the Azure Python SDK will refuse to connect to azurite, reporting errors such as:
azure.core.exceptions.ServiceRequestError: [SSL: CERTIFICATE_VERIFY_FAILED] certificate verify failed: unable to get local issuer certificate (_ssl.c:1006)
This is because the the Azure SDK uses the Requests library, which in turn uses Certifi as its source of root certificates. Certifi provides a regularly updated bundle of the Mozilla root trust store, and our self-signed custom certificate obviously isn’t in Mozilla’s trust list!
I’ve been using Azurite to simulate Azure storage for my development. If you’re not familiar with it, Azurite is a local storage emulator for Azure Storage, and you can read my other post about how i’ve set up my devcontainer configuration to run Azurite as a service container. As my deployed code is using an Azure Managed Identity, I wanted ensure my development environment was consistent with this and also uses Azure DefaultAzureCredential credential provider class. In this post, i will talk through the steps required to switch from using a connection string (with a well-known account and key) to using OAuth and HTTPS, helping to increase feature parity between development and production, reducing the chances of mistakes.
When developing with Azure Storage, it can significantly speed up your development process if you can use a local development environment, rather than constantly connecting directly to storage in Azure itself. This is where Azurite comes in - Azurite is a local storage emulator for Azure Storage, mimicing blob/container, queue and table storage. While there are lots of ways to get it running (e.g. from binary, manually using Docker etc.), I wanted to set it up as a service container in my devcontainer configuration which provides a few benefits:
In Pulumi, when calling pulumi_azure_native.storage.list_storage_account_service_sas_output() to generate a SAS, you pass the required permissions to the permissions: Input[str | Permissions | None] parameter. pulumi_azure_native.storage.Permissions is an enum, offering simple selections (R, L etc.):
But you can also pass a string of permissions, any of R, L, D, W, C, A, or P, depending on the actions you want to allow for the SAS. This allows you to specify permissions for reading (R), listing (L), deleting (D), writing (W), creating (C), adding (A), or processing (P) blobs within the container, such as permissions="RWL":
Another note for myself. I wanted to use this to give my app access to the entire account. I thought they would be a property of pulumi_azure_native.storage.StorageAccount but they’re not. Instead you need to call pulumi_azure_native.storage.list_storage_account_keys().
In a storage account, you can create a SAS scoped to a specific container, however, that SAS does not have permission to execute BlobClient.exists() as this requires at least list privileges on the parent object (e.g. the account), and when you try to perform the check, you’ll get this error:
azure.core.exceptions.HttpResponseError: This request is not authorized to perform this operation.
Note that this is an HttpResponseError, not a ClientAuthenticationError (which is actually a more specific error which extends HttpResponseError), so you need to interrogate the specific response code, although note that if the container client does not exist, you might also get a ClientAuthenticationError with this message:
In a previous post, I created a Barman backup script to back up PostgreSQL running in an VM to AWS S3. If you host your PostgreSQL server in Azure, this can get expensive quickly because you pay egress bandwidth fees to Microsoft. In this article, i’ll show you how to use Azure Blob storage instead.
Step 1: Install Barman, barman-cli-cloud, snappy etc.
Run these on both the source and target. Obviously, if you dont have the source any more (which is why you’re restoring), you’ll need to make some assumptions…
After a bit of playing around, I decided to use Barman for the backups - it’s significantly easier to configure and use than pgBackRest and has native support for backing up to S3, point-in-time restore, and more. The major downside compared to, say, running pg_dump every night, is that it requires an identical setup to restore to - identical hardware and PostgreSQL version. Least privileges in the database is tricky - to be able to back up things like roles, the account basically needs full access to all schemas. The Barman documentation says that it should run as the same user as PostgresQL, postgres.
I’ve been using timescale.com for about a year, but it’s quite expensive for a hobbyist (their cheapest plan in the UK is about $50/month), so I thought i’d try and implement something cheaper. I know i won’t get the cool automatic DR failover or the sexy continuous backups - but it’s not really mission critical if i lose a small amount of the history of my home energy consumption. Timescale publish some instructions, but they weren’t complete, and didnt work for me.
I love using devcontainers to manage my development environment. They make it super easy to ensure a consistent development stack is in place. Recently i started developing against a MongoDB instance. For node.js, i use mongodb-unit to spin up a standalone server on the local client. But there’s no equivalent package for Python.
Although there are lots of posts on stackoverflow about configuring a single node replicaset using a healthcheck, and there’s even an example given by a MongoDB employee, they didnt work for me. When setting up the server to use authentication, it also needs a keyfile, which has to be generated and secured in a specific way or you get this error:
This is an update of my previous post, now that cert-manager is more mature, and i’ve rebuilt my server on Ubuntu 20.04 (from 18.04).
install certbot
install script to update unifi certificate
Test
Issue full certificate
Install cron jobs to automate renewal
Install certbot
Certbot installation instructions are at online of course but here’s a summary:
Update package list: sudo apt update
install: sudo apt install -y certbot
Create a new certificate using LetsEncrypt
We’re going to use standalone mode, and first we’ll get a test certificate just to validate that everything’s working (so that we don’t trigger LetsEncrypt’s rate limits).
For various reasons, not least because I wanted to play with it, we have a Yale Keyless Connected Smart Door Lock with a Z-Wave module (we have the v1 module which works fine). This lock has a couple of key features that we liked:
You can grant or revoke access using RFID tags or cards, or by entering a 6-8 digit code on the keypad.
With the Z-Wave module (and a compatible Z-Wave controller), you can programatically add and remove codes so that you can enable codes at specific time or dates. For us, this meant we could create a code for the cleaner, but if they turned up at 2am on a Saturday, the door wouldn’t open for them.
It’s connected to our Samsung SmartThings hub, and i run the RBoy Apps custom device type and smart app to enable the scheduled key rotation etc. Overall, we’ve been fairly happy with it, but the thing really does eat up batteries, and I started to feel guilty about putting between 4 or 8 AA batteries in the bin each month. Of course I also got annoyed at constantly having to buy them and change them, so I decided to try rechargeables.
Update 2021-01-08: this is now out of date. See my updated post with a much easier method.
I have a number of Ubiquiti UAPs, and I manage them with the UniFi app, installed on a linode server. Like any publicly hosted server, i want to use a trusted SSL certificate, and for that, I chose LetsEncrypt with DNS-01 validation, as i found a useful helper script by thatsamguy on the UniFi forums. I use AWS Route53 to host the DNS zone.
checked it’s running with the docker ps -a command: robert@ubd:/mnt$ sudo docker ps -a CONTAINER ID IMAGE COMMAND CREATED STATUS PORTS NAMES f33434ebccaf mnbf9rca/cups-google-print “/sbin/my_init” 2 minutes ago Up 2 minutes cups-google-print
Browsed to https://<server IP>:631/ to see that it’s running
First things first - you do this at your own risk. I take no responsibility for anything going wrong - and it can go wrong. If you are in doubt - don’t do it. And if it goes wrong - don’t blame me…
Download the firwmare files from here: sas2008 (see footnote for original source)
Extract the files and place them on the root of the USB stick.
Download the latest LSI firmware from the Avago site. You’re looking for Firmware for an SAS 9211-8i Host Bus Adaptor. At the time of writing, this is version P20.
Extract the LSI firmware to a folder on your machine.
Create a subfolder on the USB called P20
From the extracted LSI firmware, copy the following to the P20 folder on the USB:
The 2118it.bin file from <zip>\\firmware\\HBA_9211_8i_IT folder
mptsas2.rom from sasbios_rel folder
sas2flsh.exe from sas2flash_dos_rel folder
Look at the back of the card and note down the SAS address - it’s something like 500605B0xxxxxxxx.
put the card in the machine, and switch it on.
Boot to the USB stick - press F11 during POST and select USB.
Flash the firmware:
Type the following: megarec -writesbr 0 sbrempty.bin megarec -cleanflash 0
Type the following: megarec -writesbr 0 sbrempty.bin megarec -cleanflash 0
Reboot, again booting from the USB stick
Next, install the P10 or P11 firmware - type the following: sas2flsh -o -f 2118it.bin -b mptsas2.rom sas2flsh -o -sasadd 500605bxxxxxxxxx (x= numbers for SAS address)
Reboot, again booting from the USB stick
Finally, upgrade to the P20 firmware - type the following to change to the folder and execute flash of the new firmware: cd p20 sas2flsh -o -f 2118it.bin -b mptsas2.rom
Remove the USB stick
Reboot.
Some people recommend to disable loading the Option ROM. On my machine, loading the option room caused an NMI, so i ignored it, but if you want to do it: Load the Option ROM (press CTRL-C on boot) and set “Boot Support” to “Disabled”
The original instructions for this task are here, with my additions to update to the P20 firmware - I’ve archived them here for my own reference.
This post is the second in my series describing how i migrated from Unraid to Napp-It, and describes how I prepared for migration.
So - preparing for migration…
First, i wanted to capture the docker configuration for each of my existing containers. To do this, I forced the container to update, then when unraid presented me with the “success” screen, I captured the docker run command, like this (which captures the RUN command for my CUPS container with Google Print extensions): root@localhost:# /usr/local/emhttp/plugins/dynamix.docker.manager/scripts/docker run -d –name=“cups-google-print” –net=“host” –privileged=“true” -e TZ=“UTC” -e HOST_OS=“unRAID” -e “CUPS_USER_ADMIN”=“admin” -e “CUPS_USER_PASSWORD”=“pass” -e “TCP_PORT_631”=“631” -v “/mnt/user/appdata/cups-google-print”:"/config":rw -v /dev:/dev -v /etc/avahi/services:/avahi -v /var/run/dbus:/var/run/dbus mnbf9rca/cups-google-print
I’ve been a user of Unraid since 2012, when I had to find a solution to my home storage after Windows Home Server was abandoned by Microsoft. Unraid has been very good for me, and the introduction of a Docker engine with Unraid 6 was very welcome. That said, I’ve recently encountered issues with bitrot, and the fact that unraid can’t use ZFS as the disk format annoys me. LimeTech claim that their parity check process should detect bitrot - however, something doesn’t seem to be working, as using using the Dynamix File Integrity plugin i can see it happening. In any case, knowing it’s happened isnt the same as being able to correct it, which just isn’t possible on Unraid without using BTRFS but many people simply don’t trust BTRFS, and besides, I fancy a change. So - over to VMWare EXSi and ZFS on Napp-It.
As I’ve been playing around with Azure Functions I’ve slowly outgrown the web-based editor. It’s not that it’s not useful, it’s just that I miss intellisense (I’ll come back to this in a later post), and I accidentally deployed a change which broke one of my functions. I’d made dozens of tiny changes, but I simply could not figure out which one it was. Not having a version history, I was kinda screwed.
I’ve been playing around with my Nextion and a Particle Photon for a while. The idea is to pull data from a variety of services and have it available on a display by the front door - things like the weather, the outside temperature (from my Netatmo), and the next 3 trains to Seven Sisters from our station. Living, as we do, at the end of the Enfield Town branch line, it can be a bit hit and miss as to whether or not you make the train, or if it’s even running.
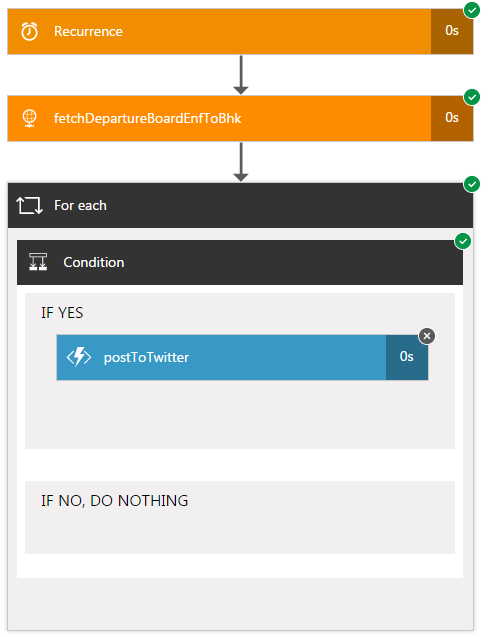
I started writing EnfieldTownBot using Azure Logic Apps. It’s pretty easy, but i soon hit a challenge - it’s so expensive! My app was pretty simple - a trigger, a “for…each”, a condition and a http callout to my Twitter Poster Function App:
So - if there are no delays, that’s (recurrence + httprequest + foreach + 3 x (condition)) = 6 actions. There could be up to 9 if the postToTwitter action also triggers. I want to run this function 2x (once for trains FROM Enfield Town, once for trains TO Enfield Town), so that’s 12-18 actions per request. And I want to run it every 15-30 seconds to get the latest information published ASAP. So that’s 48-72 actions per minute. Over a day, that’s 69,120 to 103,680 actions. Over a (31 day) month, that’s 2,142,720 to 3,214,080 actions. Taking a mean of these (2,678,400), and looking at the current pricing, it would cost me £450 a month to run this app. Wow. I don’t care about late trains THAT much…
After my last post, I spent some time looking through this. Eventually, I found a really lightweight class which does what i need.
After spending some time adding some error handling to the api.request() method, I then wrapped a webrequest around it and created a function app. You can find it here: https://github.com/mnbf9rca/TwitterFunctionApp
I have to say that the twitter API documentation is absolutely abysmal. It’s impossible to navigate - calls make reference to other calls but the major problem is that there are almost no examples - they almost all recommend that you use a library. So how on earth are you supposed to learn how the API works? How do you write a bot which tweets as itself (such as my https://twitter.com/EnfieldTownBot)?
When we bought our house a few years ago, we totally gutted it and one of the things we installed was an evohome heating system. Honeywell has an iphone app for the evohome, so recently, I decided to explore the API. Unfortunately, Honeywell doesn’t seem to offer a public API, so I spent a bit of time deconstructing the app with the help of the excellent Charles Proxy.